
Quick answer: If developed film shows unexplained streaks, fogging or patches, first inspect the negatives rather than assuming the camera needs new foam. If the camera might contain a roll, do not open the back. Once it is safely unloaded, deteriorated foam along the film door may be one possible cause. Repair and confirmation depend on the camera model.
Scope: The seal-replacement examples mainly concern 35mm cameras with foam film-door seals. Other camera designs require different procedures.

On this page: Recognize marks · Inspect safely · Repair options · Verify the result
How film-camera light leaks appear
Unwanted light reaching film before processing can increase negative density; after development it may appear as streaks, patches or veiling in a scan or print. Colors and shapes vary with film, exposure, processing and scanning. A streak is a reason to investigate, not a diagnosis on its own.

Check whether the mark appears on the developed negative itself and whether it repeats across frames. If a mark appears only after digitization, check the negative-scanning workflow before assuming light entered the camera.
Before opening the back: make sure the camera is unloaded
Never open the film door just to look for light leaks if an exposed or partially exposed roll may still be inside. A frame counter is not definitive proof that the camera is empty. If unsure, keep the back closed and follow the correct rewind/unloading procedure for your camera. See our 35mm film loading and rewinding guide.
How to inspect a camera for possible light leaks
On a fully processed negative, hold only the edges and use diffuse light to inspect image areas, film margins and adjacent frames. Avoid scratching the emulsion; ask your processing lab for help if you cannot interpret the marks.
| Observation | Check | Next action |
|---|---|---|
| Mark only in scan | Compare with the developed negative | Inspect scanner glass, holders and editing workflow |
| Repeated mark visible on negatives | Compare location across several frames | Inspect an unloaded camera and seek model-specific guidance |
| Uneven density or marks after development | Ask whether processing or handling could contribute | Consult the lab before replacing camera parts |
Diagnosis: use the developed negative first
- Look at the negative under even light. If the mark exists on the film, investigate exposure, handling and processing; if it only appears after digitizing, investigate scanning first.
- Compare multiple frames. Record where marks repeat, whether they affect frame edges or gaps, and which shooting conditions coincide with them. Patterns are clues, not proof of a particular leak.
- Keep the camera closed until film is removed. The frame counter alone cannot confirm it is empty. Follow model-specific unloading instructions.
- Inspect accessible seals only when unloaded. Check appropriate door channels, hinge and latch areas for missing, sticky or crumbling foam, without touching shutter curtains or distributing debris.
Decision: Scan-only marks suggest a scanning problem. Repeated marks on actual negatives alongside deteriorated seals justify model-specific seal investigation but do not establish the sole cause.
Other causes to rule out before repair:
- Marks introduced by dust, holders or scanner optics rather than visible on film.
- Processing or handling defects: ask the film lab when the cause is unclear.
- Other camera entry points, joins or bellows: these need model-specific inspection.
- If the apparent foam is intact, access is difficult, or the diagnosis remains uncertain, consult a qualified camera technician.
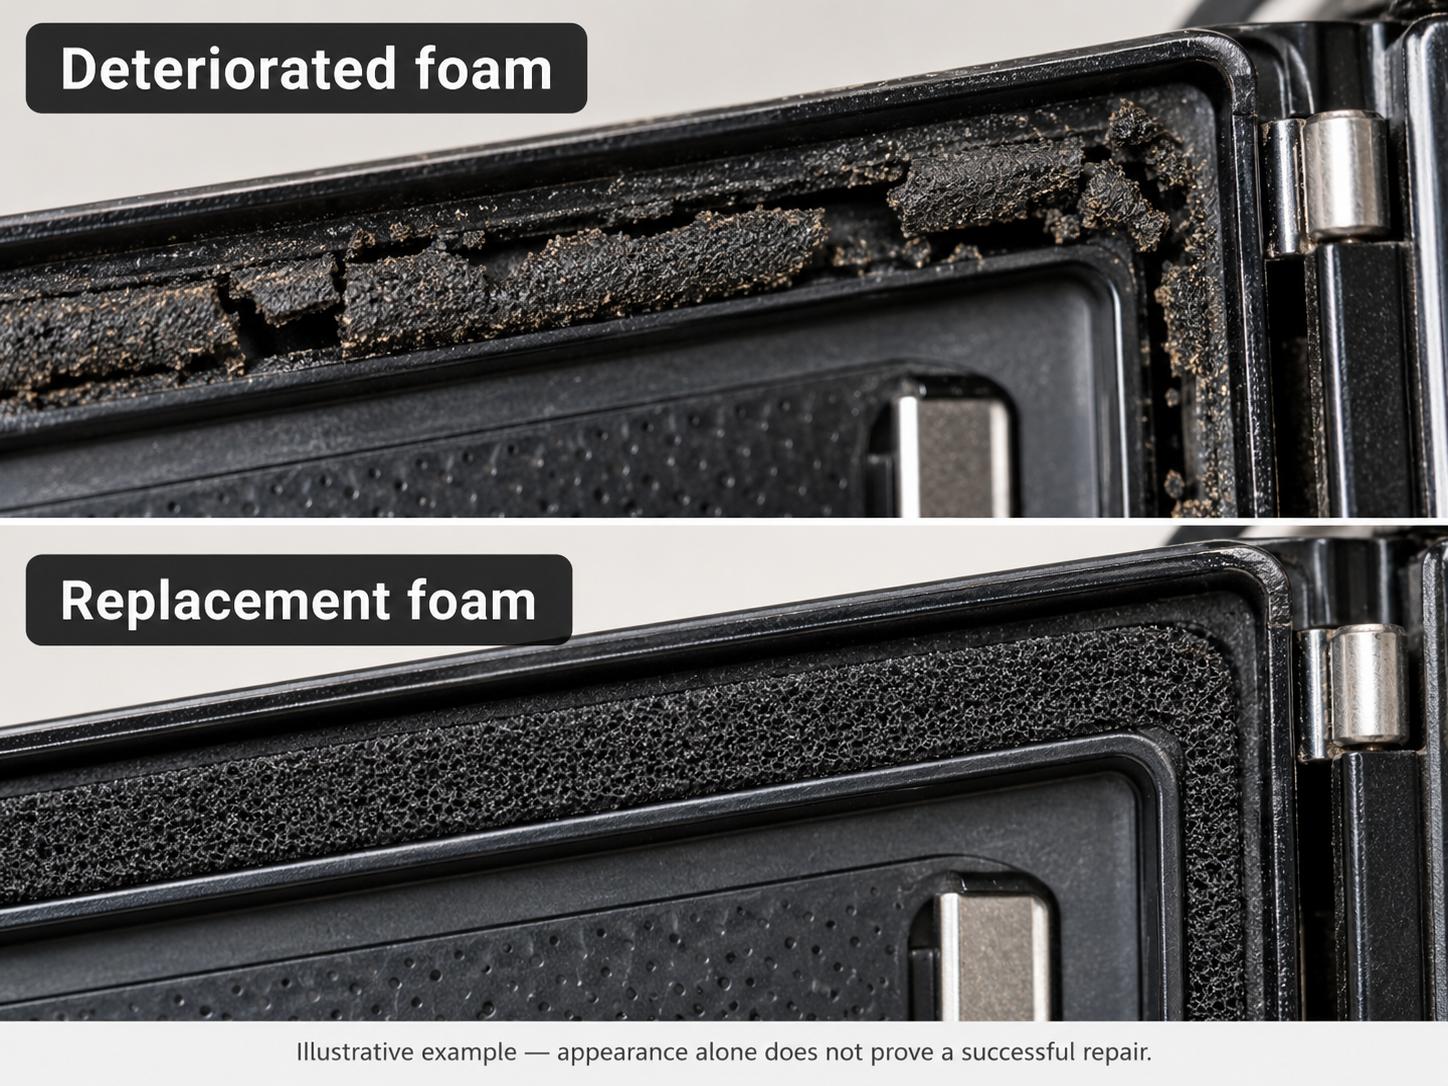
How to fix deteriorated seals safely
If accessible foam is deteriorated, consult repair instructions specific to the camera model and obtain a compatible replacement material. The Canon A-1 repair guide and Minolta X-700 walkthrough provide photographed, model-bounded examples; do not assume their seal dimensions or positions apply to all cameras.
Is this a suitable DIY repair? Check these conditions before starting:
- Your exact model’s seal locations and replacement material are documented.
- The work concerns accessible film-door seals, not shutter or transport mechanisms.
- You have a safe debris-control method documented for your camera.
- If any condition is unmet, seek a repair technician rather than improvising.
Safe sequence for replacing accessible film-door seals
- Identify the camera and its original materials. Consult a guide for that model and locate each foam or felt seal. Do not apply another model’s strip dimensions.
- Prepare safely. Unload the camera; power off and follow its specific battery-removal instructions. Use a clean, well-lit work area. Before disturbing any old foam, protect vulnerable openings exactly as shown in a repair reference for your model. Never put protective tape on shutter curtains; if unsure how to shield sensitive parts, stop and obtain professional help.
- Remove old seal residue carefully. Lift deteriorated foam from accessible channels using an appropriate soft tool; do not lay replacement over crumbling residue. Collect loose fragments. Clean and allow surfaces to dry according to model-specific guidance; use solvents only where confirmed safe.
- Measure and dry-fit compatible replacement. Check lengths and placements before attaching material. Keep hinges, latches and other mechanisms unobstructed.
- Install and let adhesive set. Follow the replacement material and adhesive instructions. Do not rush to load new film.
- Check door operation. When the material is set, confirm that the unloaded door closes normally without force or interference. Seek a qualified technician for uncertain locations or work near sensitive internal components.
The photographed Popular Photography procedure shows removal, fitting, curing and testing in one specific camera; use your own camera’s compatible instructions.
How to check whether a repair worked
New-looking foam and a normally closing door are not proof of a light-tight camera. Where appropriate, shoot and develop an inexpensive test roll in ordinary and brighter light, then examine the actual negatives. If similar marks remain, reassess the diagnosis. A clear test roll improves confidence but does not guarantee every future lighting condition.
Test-roll checklist
- Record the original problem and affected frame numbers before replacing seals.
- After adhesive has set, load fresh, compatible film according to the camera manual.
- Shoot under a mix of ordinary and bright lighting around the camera; record frame numbers and conditions, not merely whether the subject is brightly lit.
- Unload the film according to your camera manual, have it processed normally, then inspect the negatives before judging scans.
- Compare new marks with earlier ones. If symptoms persist, reassess other causes instead of replacing foam repeatedly.
A clear roll supports success under those tested conditions, but does not guarantee a permanently light-tight camera.
Common beginner mistakes
- Opening a camera while a roll may still be loaded.
- Assuming every red or orange streak is a film-door leak.
- Copying another camera model’s seal thickness or adhesive specifications.
- Allowing old foam or cleaning residue into the shutter or film path.
- Claiming a successful repair before inspecting a developed test roll.
Quick answers
- Can I check the door seal with film loaded? No. Keep the camera closed until film has been safely unloaded according to your camera manual.
- Does a red or orange streak prove a light leak? No. Check the developed negative and consider scanning, processing and handling problems.
- Will replacing the foam definitely fix it? Not always. Other gaps or problems may be responsible, and a developed test roll is needed for a practical check.
- Are intentional light leaks always defects? Some photographers use them creatively, but unintended leaks can spoil photographs.
Related guides
See How to Develop Film at Home for development context, and Film vs Digital Photography for differences in capture and workflow.
Sources and illustration notes
- iFixit: Canon A-1 Light Seal Replacement (camera-specific reference)
- High 5 Cameras: Replacing Light Seals (camera-specific example)
- Popular Photography: Changing Film Camera Light Seals (repair reference)
Other camera designs may use different seals or bellows. The illustrations explain possible symptoms and seal conditions. They do not represent hands-on tests, real negatives, measured camera performance or proof of repair by this website.